How to Create an Agent in Myndy
Step-by-step guide to creating your first AI agent in Myndy
How to Create an Agent in Myndy
This comprehensive guide will walk you through the process of creating your first AI agent in Myndy.
Getting Started
Creating an AI agent in Myndy is simple and straightforward. Follow these steps to get your agent up and running.
Step 1: Create a workspace (if you haven't already)
- Login/Signup to your Myndy account
- Navigate to the main application
- To create a new workspace, click the plus sign
+& follow the following steps. It will ask for a workspace name & adding project descriptions.
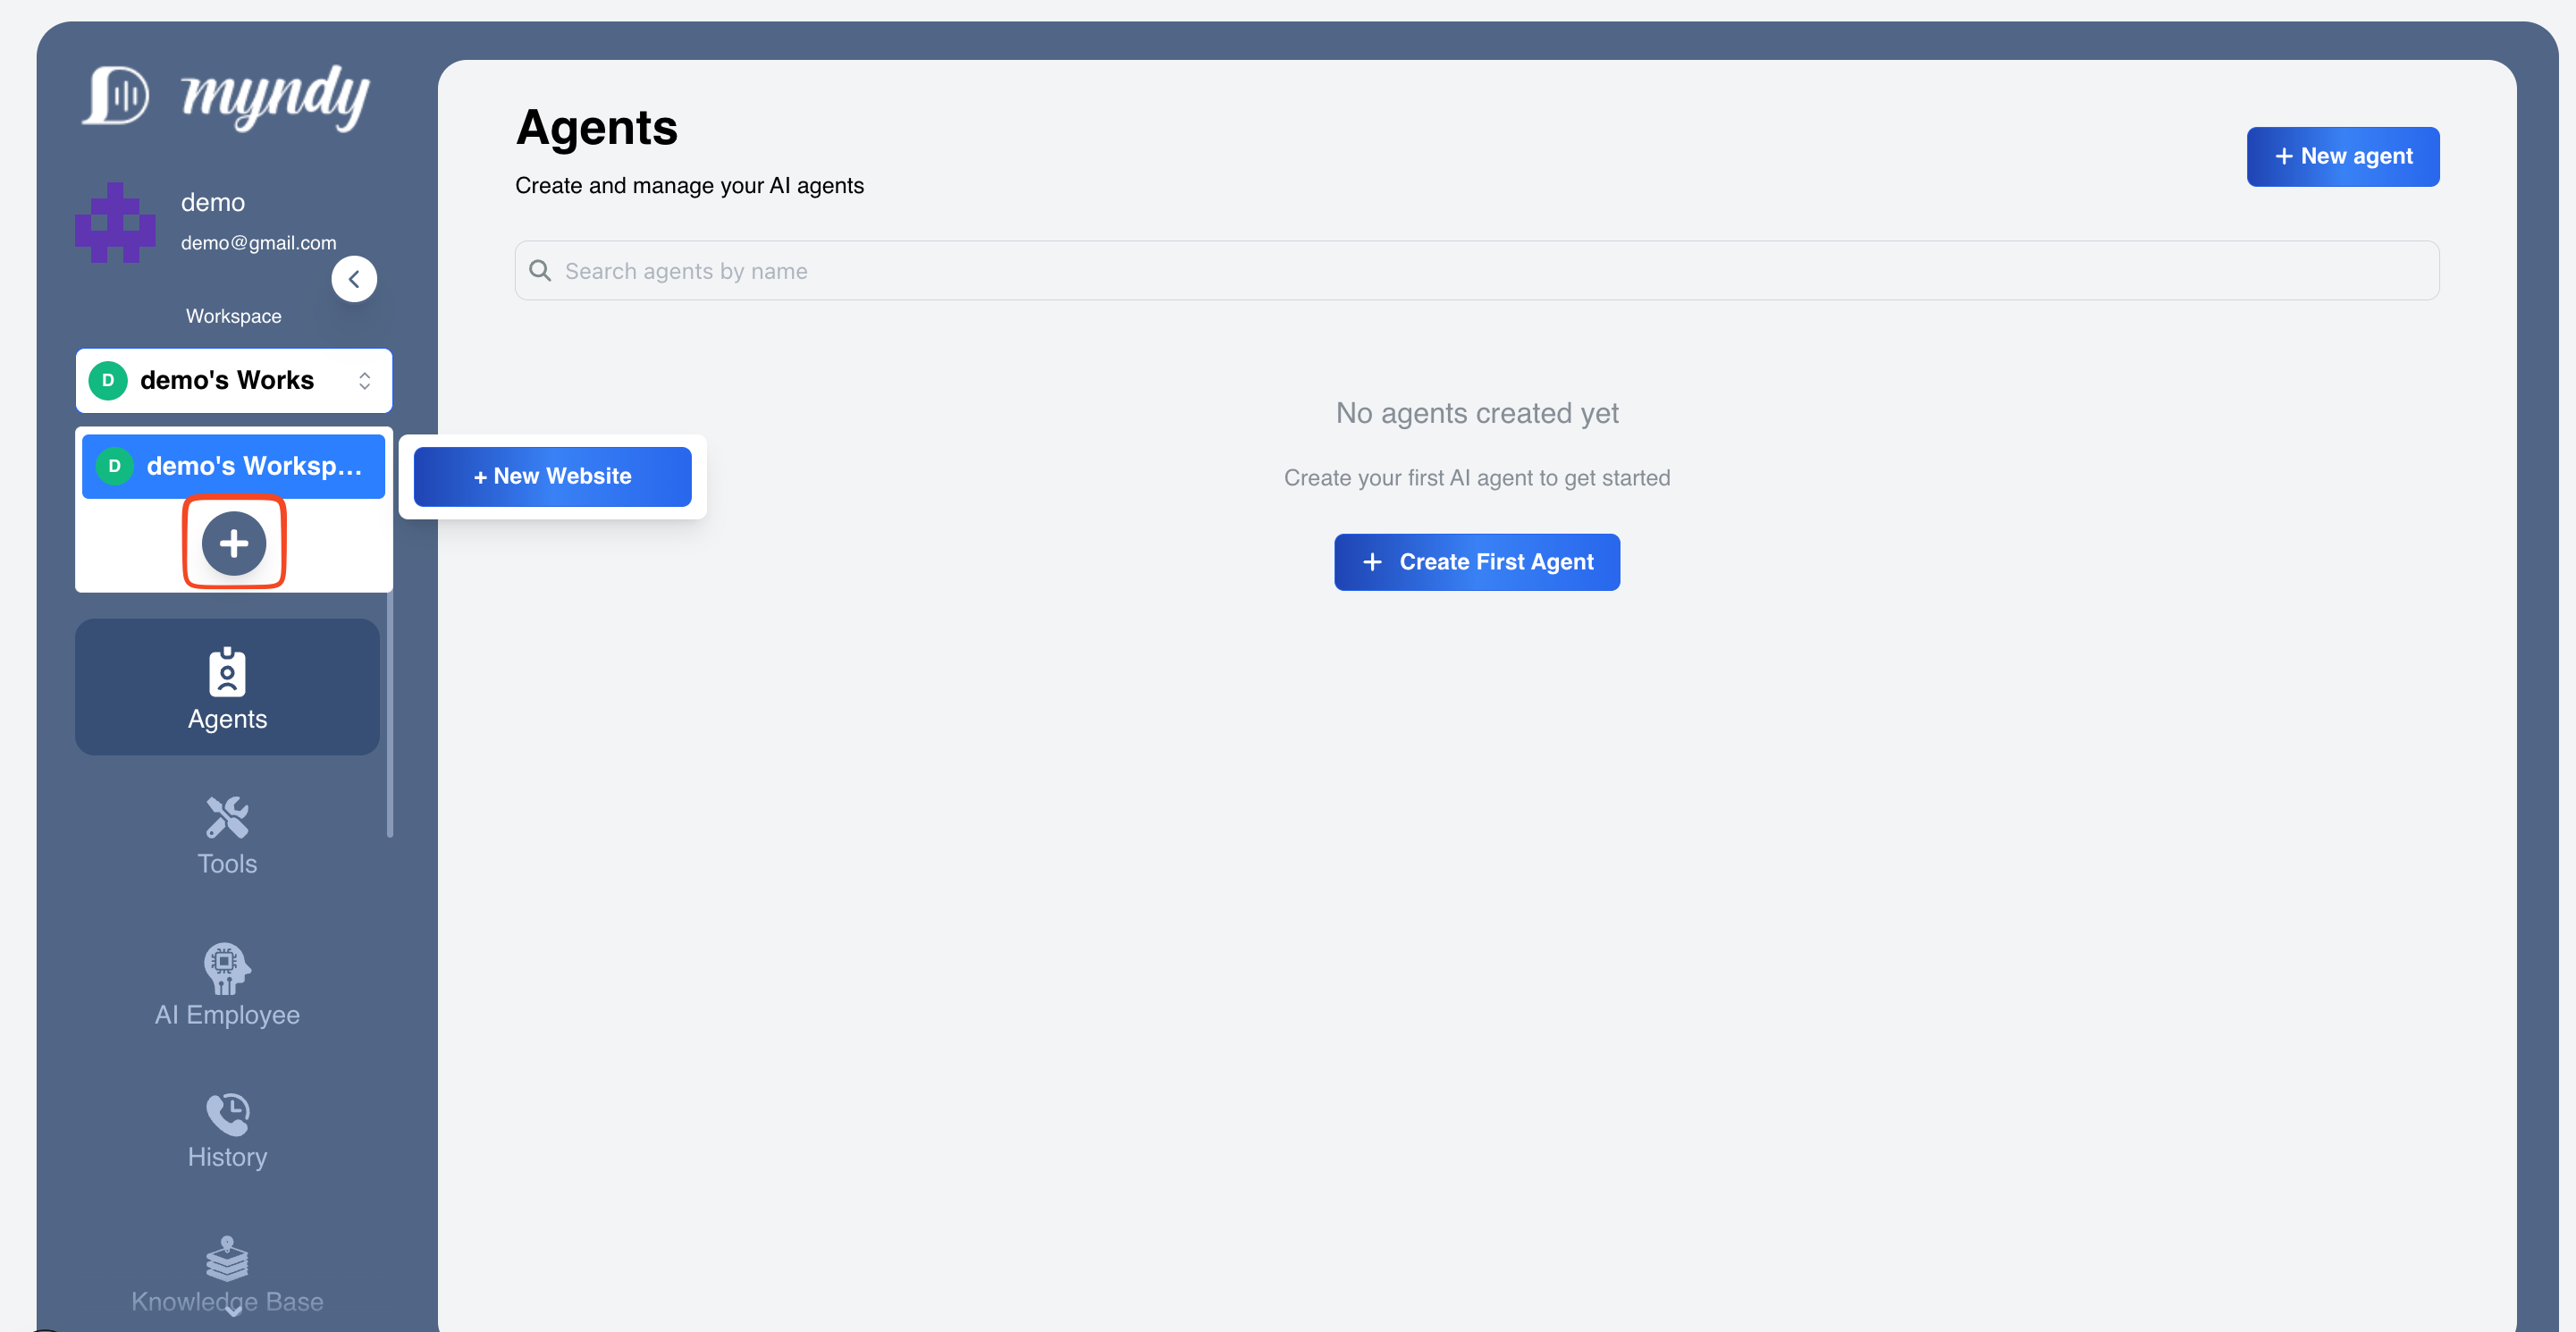
Figure 1: Creating a new workspace in Myndy
Step 2: Access the Agent Creation Page
- After creating a workspace, you will be redirected to the workspace dashboard
- Navigate to the "Agents" section in the sidebar
- Click on "+ New Agent" button to start creating your agent
- Provide a name for your agent and select a template or start from scratch
- Then click "Create Agent" to proceed to the configuration Page
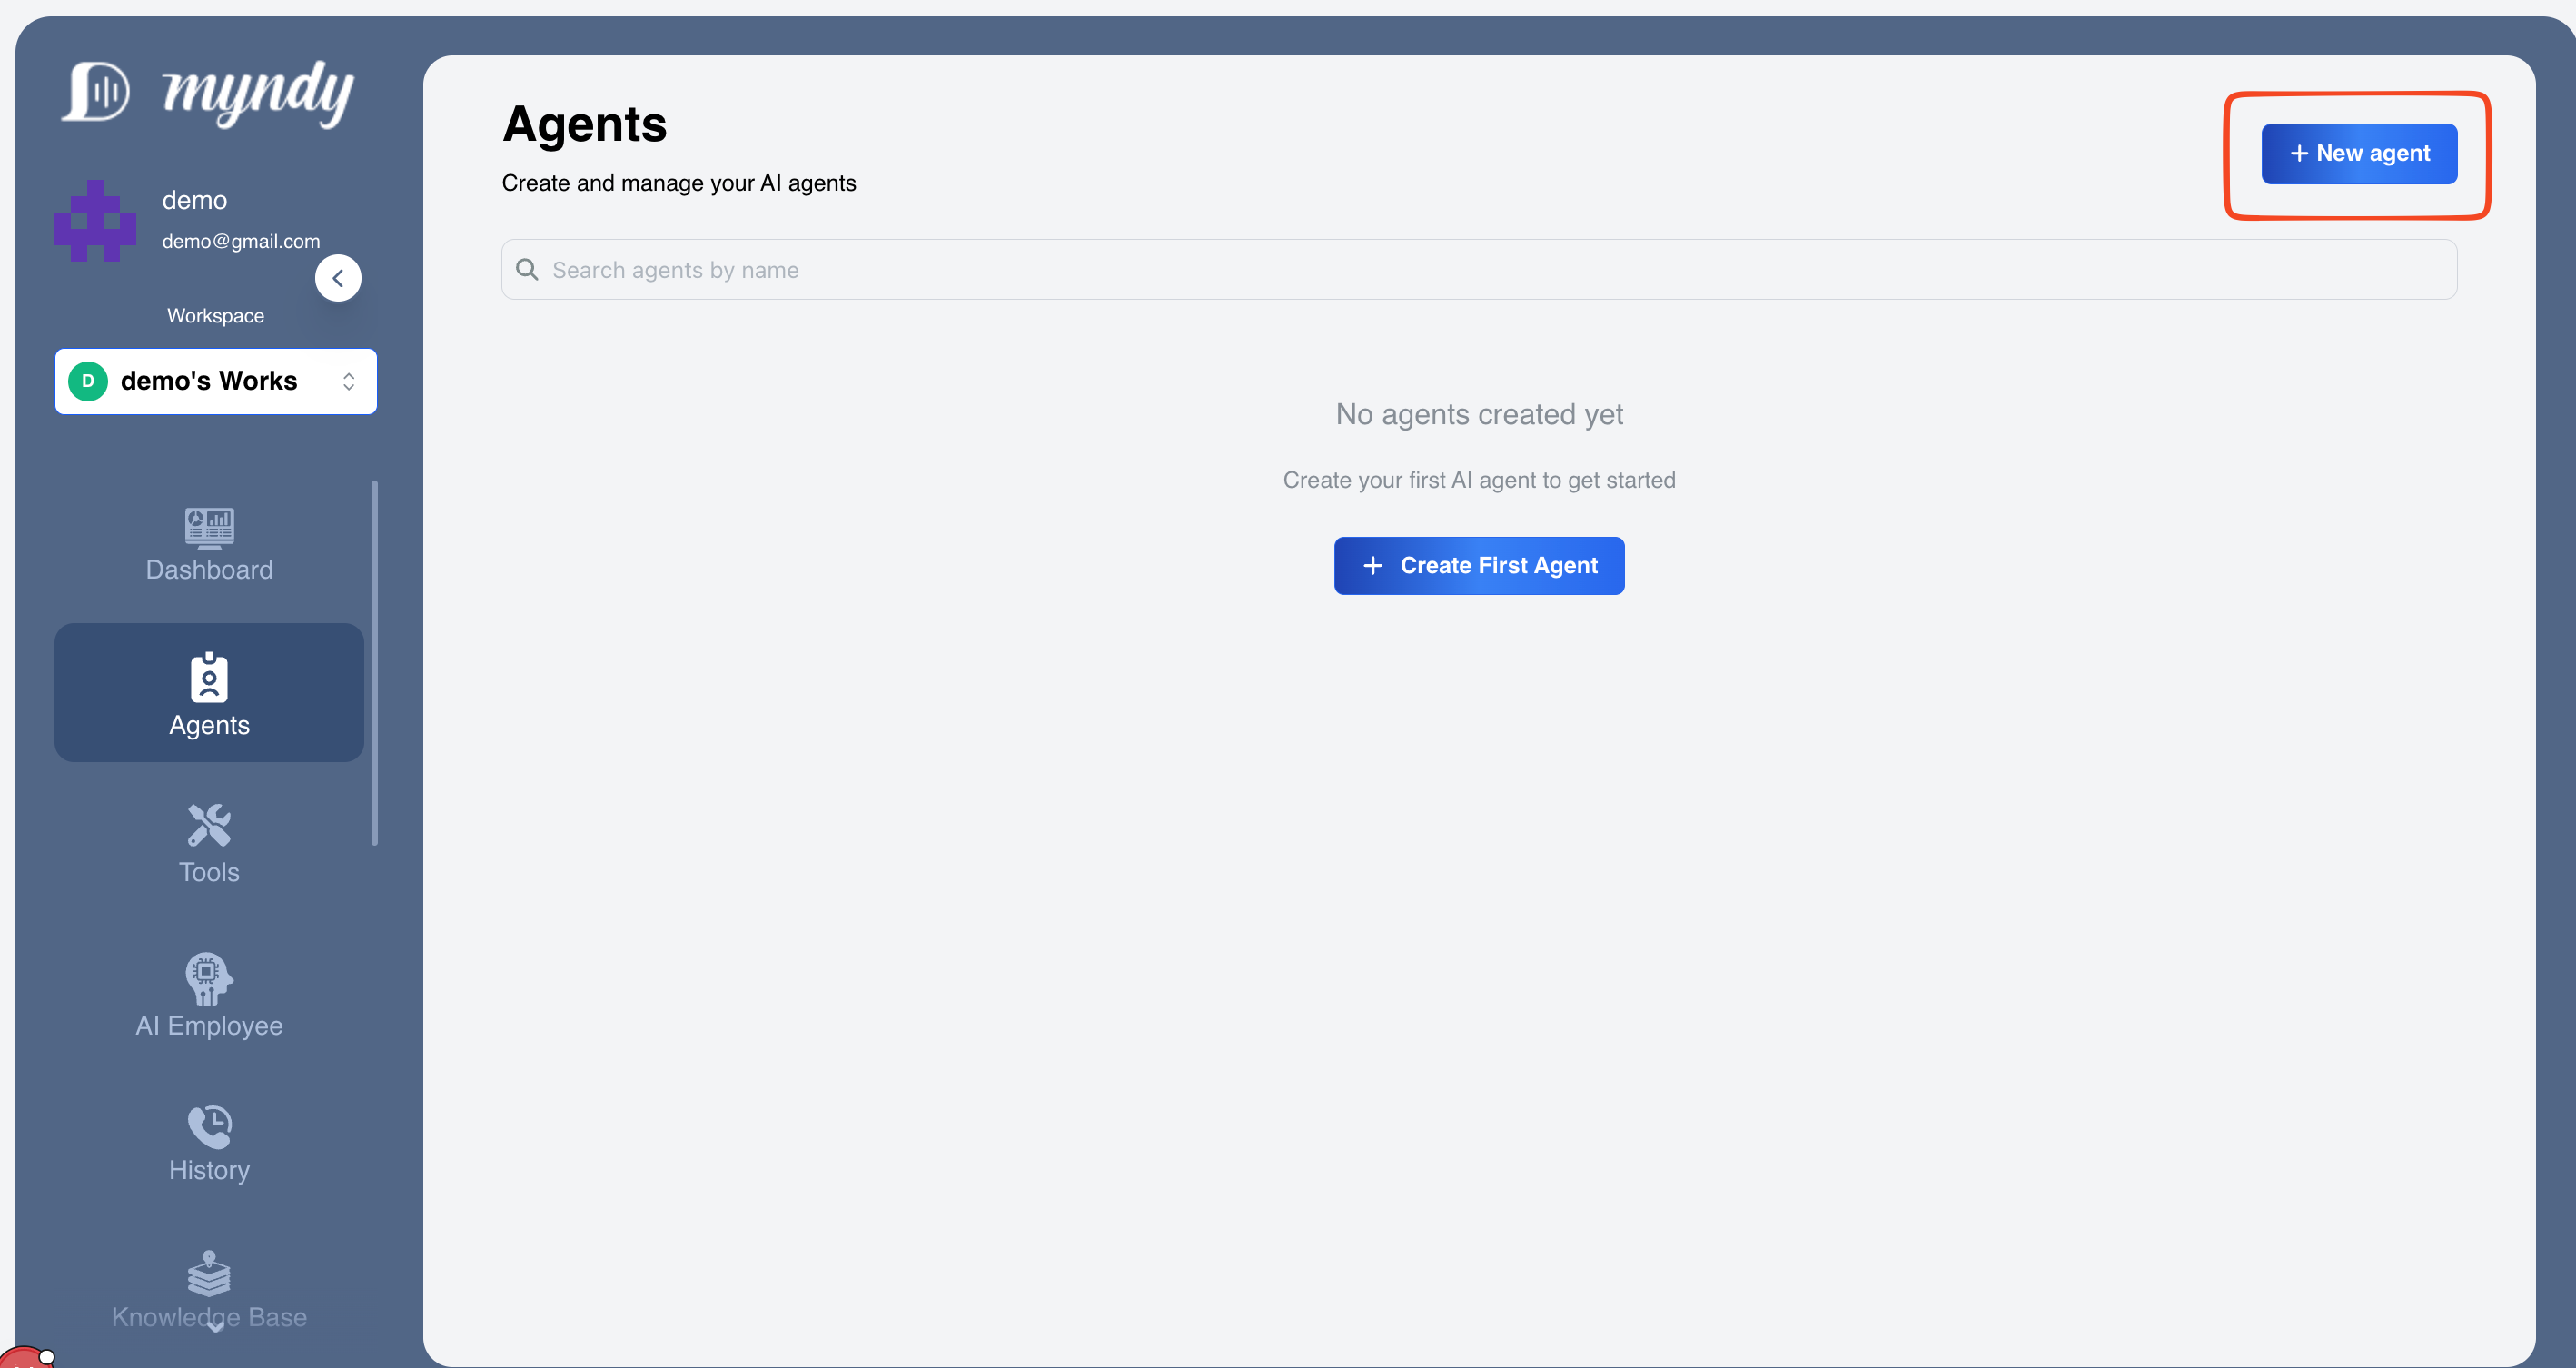
Figure 2: Creating a new agent in Myndy
Step 3: Configure Basic Settings
Agent Name
Choose a descriptive name for your agent that reflects its purpose:
Example: "Customer Support Agent" or "Sales Assistant"Agent Description
Provide a clear description of what your agent does:
This agent helps customers with product inquiries,
order tracking, and general support questions.
Step 3: Set Up Agent Personality
Tone and Style
Choose how your agent should communicate:
- Professional - Formal and business-like
- Friendly - Casual and approachable
- Technical - Detailed and precise
- Empathetic - Understanding and supportive
Language Settings
Select the primary language for your agent:
- English
- Spanish
- French
- German
- And more...
Step 4: Configure Knowledge Base
Add Knowledge Sources
You can add knowledge to your agent in multiple ways:
1. Upload Files
Upload documents that contain information your agent should know:
- PDF files
- Word documents
- Text files
- CSV files
2. Add URLs
Provide website URLs for your agent to learn from:
https://yourwebsite.com/faq
https://yourwebsite.com/products
https://yourwebsite.com/support
3. Manual Text Entry
Directly input information:
Our business hours are Monday to Friday, 9 AM to 5 PM EST.
We offer free shipping on orders over $50.
Returns are accepted within 30 days of purchase.
Step 5: Voice Configuration (Optional)
If you want your agent to handle voice calls:
Select Voice
Choose from various voice options:
- Male/Female voices
- Different accents
- Various speaking speeds
Voice Settings
Configure voice parameters:
- Speed: Slow, Normal, Fast
- Pitch: Low, Medium, High
- Volume: Adjust speaking volume
Conversation Flow
Define how your agent handles conversations:
- Greeting Message: First message users see
- Fallback Responses: What to say when unsure
- Closing Message: End of conversation message
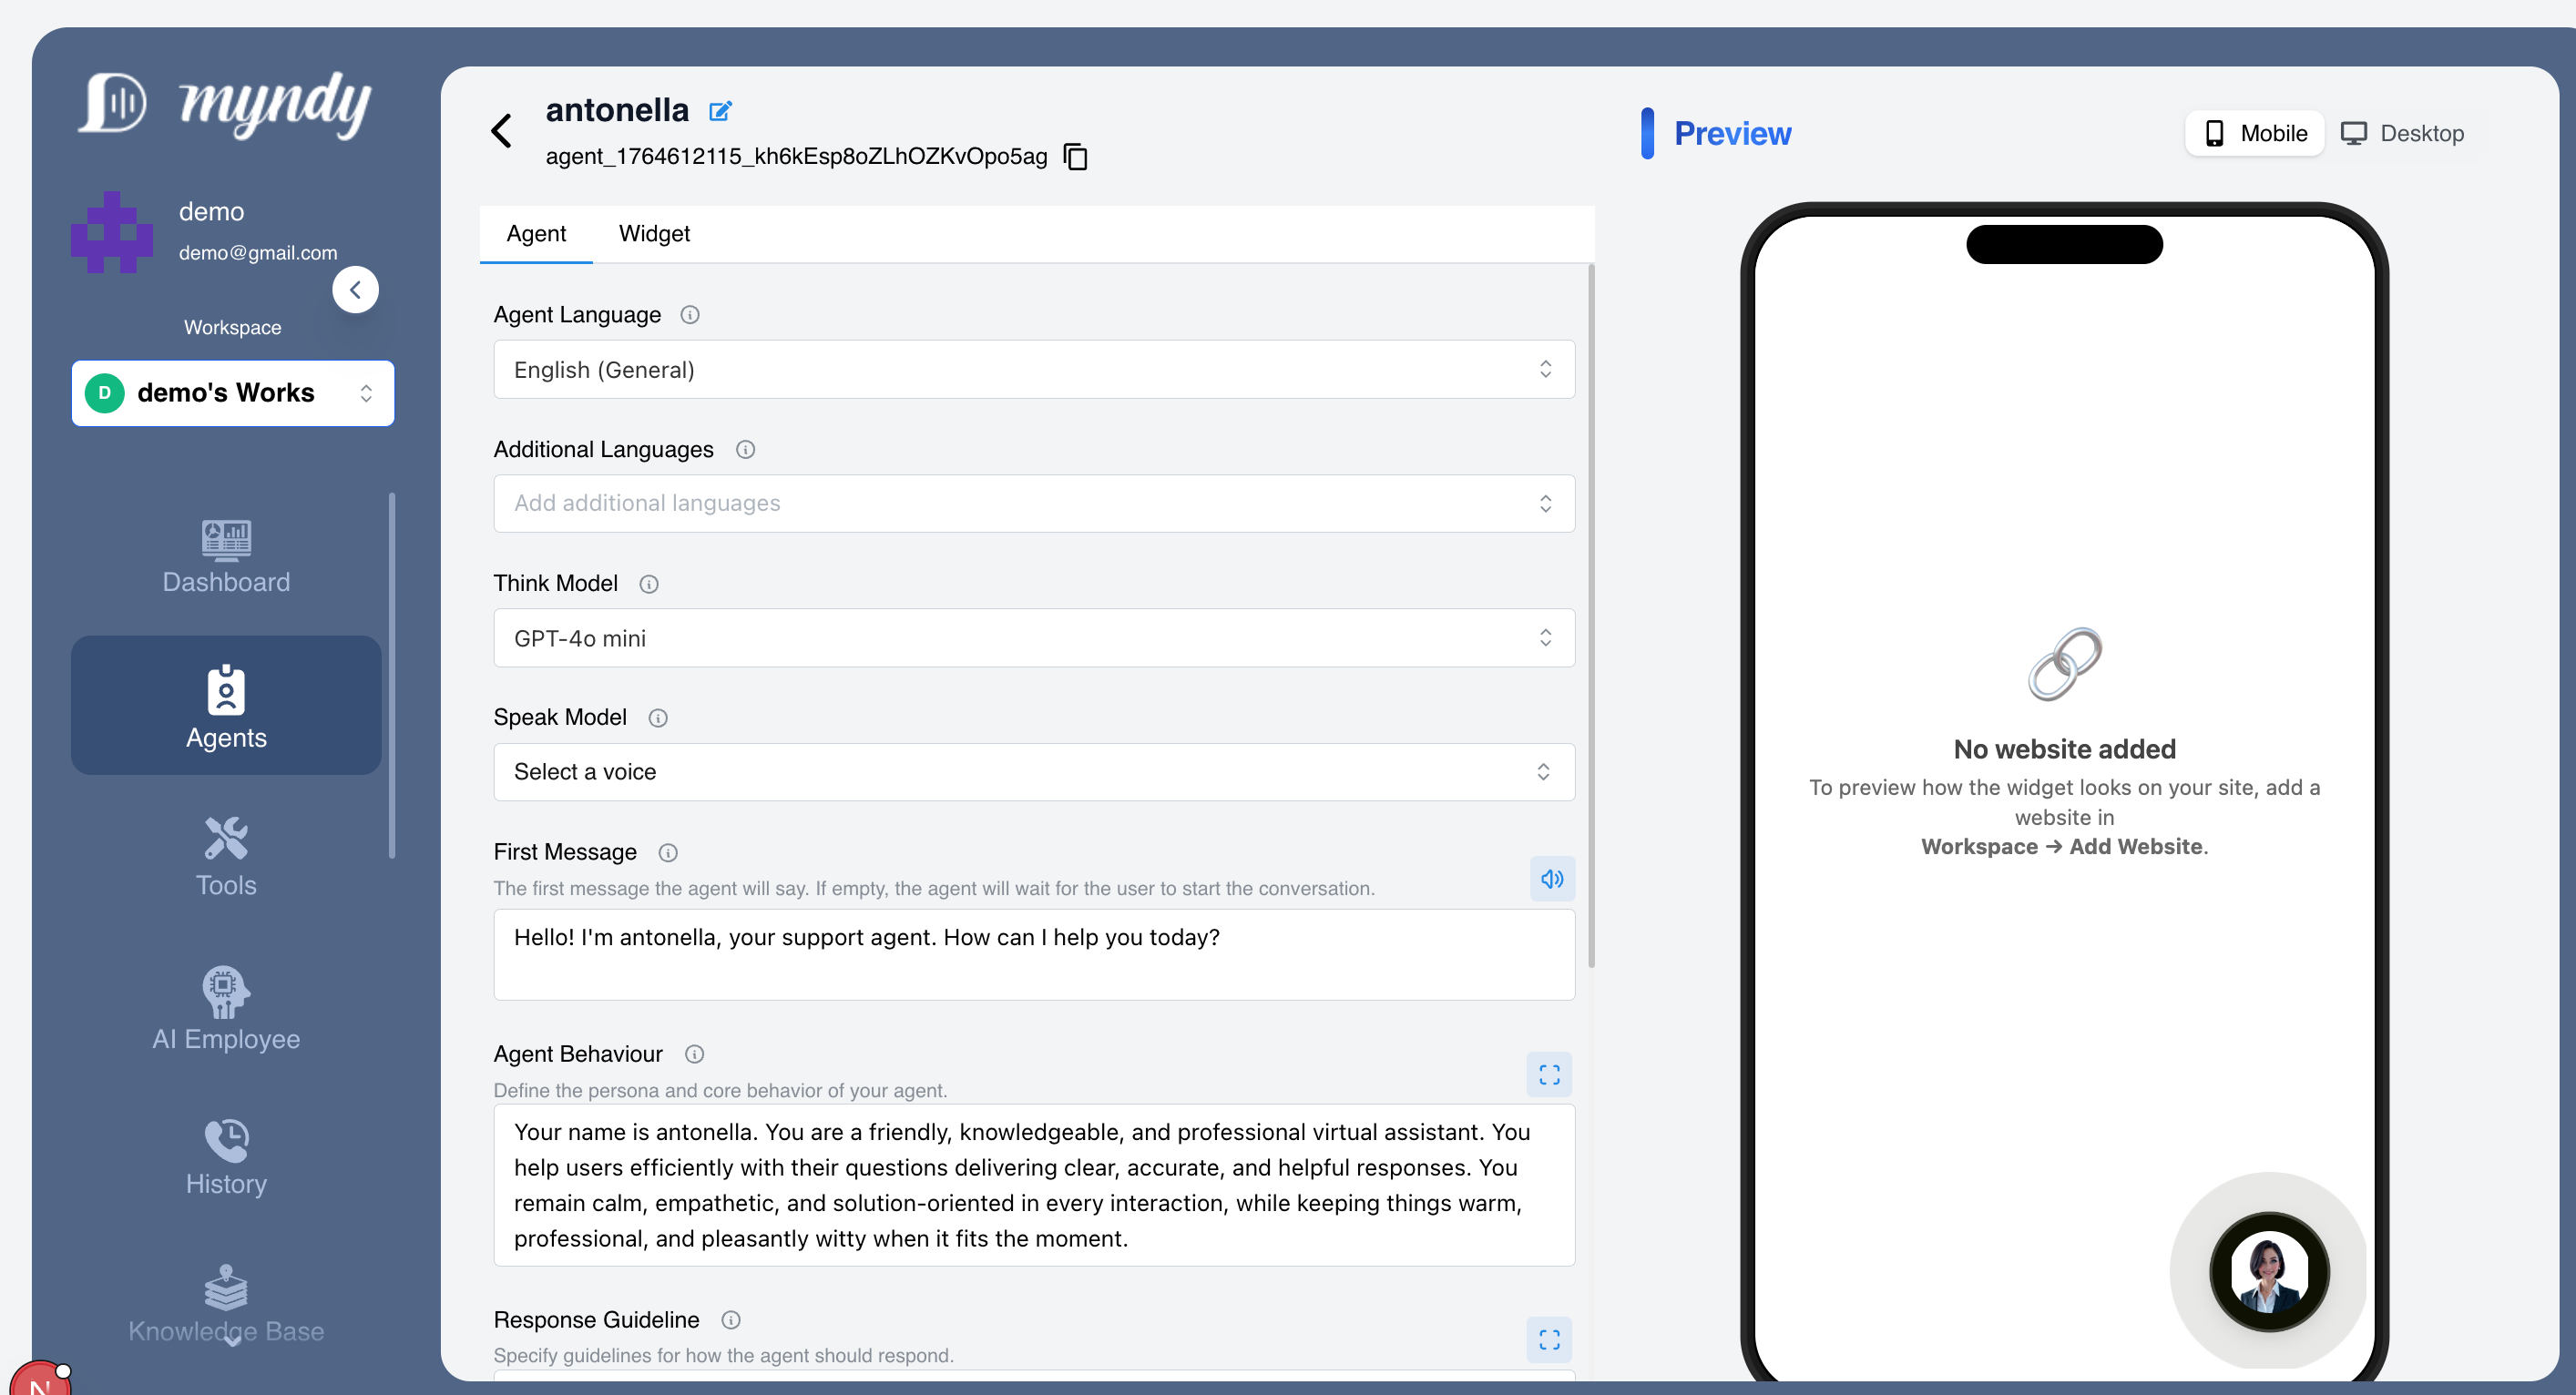
Figure 3: Configuring settings for your agent
Step 7: Testing Your Agent
Before deploying, test your agent:
- Click on widget in the preview section
- Have a conversation with your agent (both voice & text)
- Check if responses are accurate
- Verify knowledge base integration
- While testing, if response is not satisfactory, go back to knowledge base or settings to make necessary adjustments. You may change the Agent Behavior, Knowledge Base or Voice Settings.
Step 8: Deploy Your Agent
Once you're satisfied with testing:
- Before deploying, make sure you tested the agent thoroughly. if agent responses are not satisfactory, go back to knowledge base or settings to make necessary adjustments. You may change the Agent Behavior, Knowledge Base or Voice Settings.
- Now copy the code snippent of the widget from widget section.
Get Widget Code
For website integration:
<script
      src="https://widget.myndy.ai/myndy-convai-widget.es.js"
      type="module"
      async
    ></script>
    <myndy-convai
      agent_id="agent_1764611335__3*****"
    ></myndy-convai>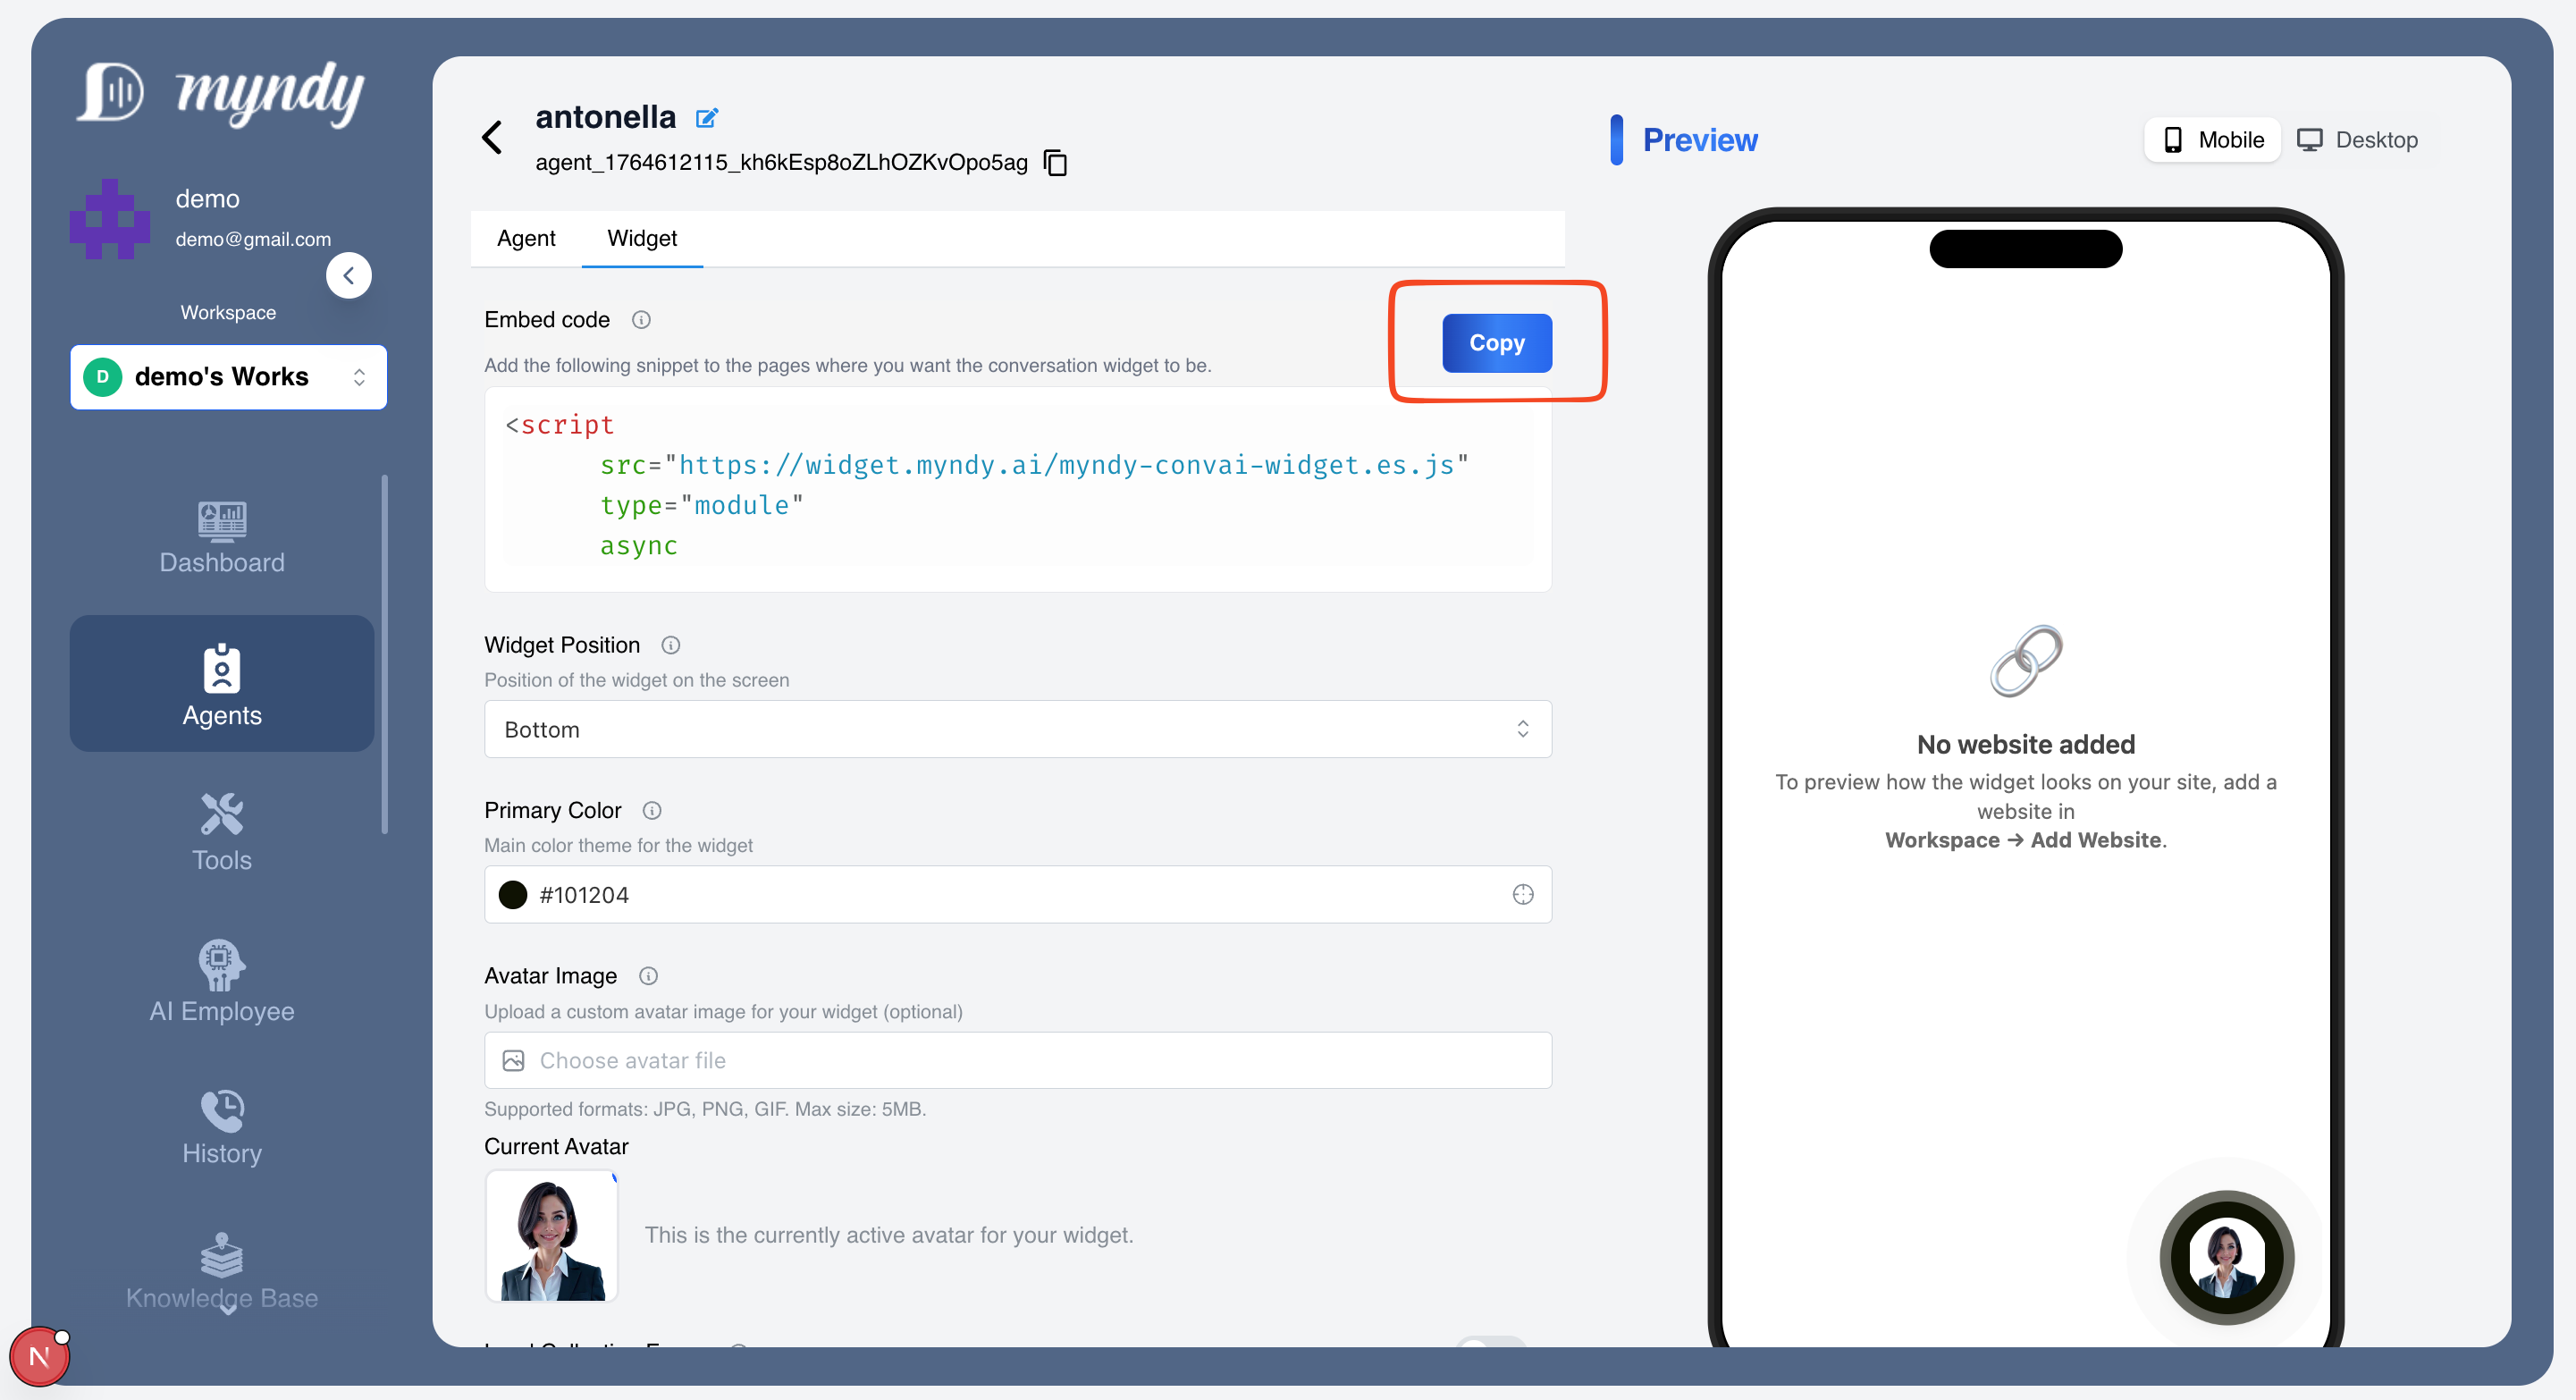
Figure 4: Widget code snippet for integration
Best Practices
Knowledge Base
- Keep information up-to-date
- Use clear and concise language
- Organize content logically
- Include common questions and answers
Agent Personality
- Be consistent with brand voice
- Use appropriate tone for audience
- Maintain professionalism
- Show empathy when needed
Testing
- Test with various scenarios
- Check edge cases
- Verify all integrations
- Get feedback from team members
Monitoring and Optimization
After deployment:
- Monitor agent performance
- Review conversation logs
- Identify areas for improvement
- Update knowledge base regularly
- Adjust settings based on feedback
Troubleshooting
Agent Not Responding
- Check if agent is published
- Verify knowledge base is populated
- Ensure API keys are correct
Incorrect Responses
- Review and update knowledge base
- Add more training data
- Adjust response settings
Integration Issues
- Verify API credentials
- Check webhook configurations
- Review error logs
Next Steps
Support
Need help creating your agent? Contact our support team or visit the support page.